Showing posts with label Crafts. Show all posts

Monday, November 19, 2012

Kids Ice Ornaments Craft


Kids Ice Ornament Craft!
 Okay, I have done this is the summer, but winter is another story. Funny how teachers must constantly reinvent tried and true preschool curriculum.
Well, here it is, and for good measure I put a popular link in there that is great for summer from A Sense of Wonder.
Here is how we reinvented summer ice activities to Kids Ice Ornaments for the winter and what our preschoolers are doing with them!

From A Sense of Wonder-Great Idea!
What you'll need to make Kids Ice Ornaments
  1. Balloons
  2. Sink
  3. A Freezer (if it's not snowing outside)
  4. Food Coloring
  5. Glow Sticks (optional, but oh so much fun)

Kids Ice Ornament Process
Kids love filling up the balloons in the sink, but what they love even more is splashing one another! Defiantly recommend direct supervision and assistance with the food coloring.
  1. First have the child put a few drops of food coloring in the empty balloon.
  2. Light a glow stick and place it inside the balloon.
  3. Assist child in filling up balloon at the sink and tying it off.
  4. Make sure there is plenty of room in the freezer and place them inside.

Depending on the size of the balloon, it may take a few hours to an entire day for them to solidify.
When it's time to take them out have the children figure out a way to unwrap their ice ornament.

We love to place them in the sensory table lined with aluminum foil and other round objects like unique marbles, and glittery round objects. We turn off the lights and enjoy the soft glow of the glow sticks inside. I love to do this when we study space and planets!

If you can, make more with the children during the coldest weather and arrange to take home and place outside their door!


Saturday, April 21, 2012

Kids Crafty Bottle Bird Feeder


Materials list for the Kids Crafty Bird Feeder
  1. Empty Liter Bottles with Lids
  2. Bulk Wooden Spoons (Available at the Dollar Store)
  3. Bulk Wild Bird Seed
  4. Scissors
  5. Sharpie Marker
  6. Masking Tape
  7. Small Eye Hook Screw(s) (Enough for each lid)
  8. Twine or yarn
  9. A nice shade tree with sturdy branches

The Process
Teacher Prep: Use a sharpie and mark two sections per spoon you would like to have them placed. Make sure your "entrance and exit" Sharpie marks are parallel to one another. After you punch small holes in the marks with the tip of your scissors, place one more just above one of the holes. This third hole will disperse seed in the bowl of the spoon.
Get the lid, and screw in the eye hook in the center of the lid. Make sure it's secure.

The Kids Part: Give the children the wooden spoon(s) and allow them to figure out how to put them through the proper holes. This is a great fine motor exercise. When they are finished have them clip a piece of masking tape to cover the 'third seed dispensing hole'.

Allow the children to fill the bottle with the seed and place the lid on top. They will place a length of twine through the whole and tie it.
We love to go out as a group and pick our branches to tie them to. It's then that we take the tape off and allow the bowl of the spoons to fill with seed.

Be sure to get a camera. The kids love to show their families proof that the birds came!

Bird picture found on Facebook from All it Takes is a Can Opener & Crockpot.

Thursday, April 19, 2012

Kids Easy Photo Fabric Bean Bag Craft

Thank Photo Gifts and Ideas
Bean bag crafts are always a winner with kids. For years, doing so much by hand has cause me to neglect some of the most creative uses for technology! After seeing this craft I am definitely looking into it more!
Here's what you'll need for your Kids Easy Photo Bean Bag Craft
2 tablespoons of Alum
2 1/2 teaspoons of Arm and Hammer Washing Soda
1/2 teaspoon of liquid fabric softener
1 cup of very hot water
Muslin cotton fabric (you will use approximately 8 1/2” x 11” [rectangle shapes] per child)
Freezer Paper (you will use approximately 8 1/2” x 11” [rectangle shapes] per child)
Scissors
Medium size mixing bowl
Mixing spoon
Software: Adobe Photo Shop Elements (if your not looking to spend your moolah on Photoshop, just yet)
Computer and Ink Jet printer (A laser printer is a no-no for this project. I'll explain why later.)
Iron and Ironing Board
Kids Markers (optional)
Sewing Machine or needles and thread (optional)
Digital Camera
Sharpie
Drying rack with clothes pins
Bag of beans or rice
Stapler

Okay, it seems like a big supply list but it isn't really, much of what we had was already on hand. Depending on how much child involvement you encourage depends on the difference between a day or two of completion. I like involving the children as much as possible, so I purchased extra muslin and put them to work on it first. I have twelve kids that don't like to miss a day of school, so nothing ever goes to waste.
The Process

Get Fabric and Paper Ready: Pre-cut 5"X5" piece of muslin and 8 1/2” x 11” Muslin and Freezer Paper (The trick is to cut them while they are placed one on top of the other) use a paperclip or staple to fasten your clipped muslin a freezer paper together so they don't get mixed up.

Snap a Picture: Give the children a 5"X5" piece of muslin to color with markers on. This will be the backing to their bean bag. While they are doing that snap a picture with my digital camera.

Try Setting up the Process in Learning Centers: We set up a 'Mixing Table" for the children with a parent volunteer. Mix the alum, washing soda and hot water in a mixing bowl and make a solution. Do this over and over with the children because the fabric will need to soak up the solution you're making. Besides, the children love to watch the science of it fizzing up.
Write the child's name of the muslin and freezer paper with a sharpie and have them dip an 8 1/2” x 11” piece of muslin in the mixture and  least 15 minutes before squeezing it out. The children will then allow it to dry on the drying rack until the next day. Remember, keep your matching freezer paper in a safe place!
Once the fabric is dry, take out the freezer paper, iron and ironing board. Depending on the age of the children you can iron it with them.  We put freezer paper shiny side up and iron the treated fabric to it until it is cleaved nicely. These are all 8 1/2” x 11” rectangles, so they will run through or printer properly. We trim any excess paper of fabric after we are done ironing.

Getting ready to print..


 In whatever program you choose, size your pictures to 4″ x 4″ images and print them onto your fabric. We set the canvas size to 8 1/2" x 11" to perfectly match a regular sized paper. Place the images far apart so that you'll have plenty of seam allowance.
You can change your printer settings to the best print quality on fabric if you have that option. Always Make sure you print on the fabric side and not on the back of the freezer paper. Oh, I almost forgot, never use a laser printer because it will melt your freezer paper-not good, people--not good.

Heeeere it comes!

After you print....
More pix from The Idea Room
Get the 5"X5" fabric your children colored on with markers and match it to the their photos. Because the kids are too young to sew on this craft we stapled around the pieces front to back to create the 'bag'. The kids gladly filled the beans in the bean bags and a parent volunteer too them home to sew them. Yes, we could have easily had them sewn first and then had the kids fill them with beans but you didn't see their faces when they saw them. The kids just HAD to fill them immediately!


By the way, these make great gift for any occasion. Here are a few ideas of what you can do with them.
  • Mother, Father or Grandparents Day gifts
  • Great first day of school gift to the children
  • Instead of photos you can use picture the children have drawn
  • Great for activity centers or matching games
  • Great for circle time activities
  • Great to use as place setting for circle times or place settings
  • A great way to transition children in excusing them for new actives and name selection

 
What ideas can you think of?

Saturday, March 31, 2012

Kids Fairy Dust Craft


We highly recommend you make Kids Fairy Dust with the kids, as well as one for yourself. After all, we are all kids at heart, aren't we?

How to make Kids Fairy Dust

Materials Needed:
Glow Sticks (We got ours at Oriental Trading Co. in white for $10.95 for 12. # IN-24/11240 )
Scissors
Iridescent or Diamond Glitter (Found at any craft store)
Baby food jars (enough for each child)
Super Glue

The Process:
  1. Cut a glow stick and shake the contents into a jar. (Teacher only for this part)
  2. Add diamond glitter 
  3. Seal the top ( Super glue) with a lid.
  4. Shake well

Note: The children loved to look at these during rest time as we read the book, Tinkerbell and The Lost Treasure. They turned out simply gorgeous! Thank you to All it Takes is a Can Opener & Crockpot  (2/13/12) post on Facebook for the idea! Ours lasted about 5 hours before it began to fade but it's definitely worth it!

*Looking for more crafts with that magical effect? Check out our Glow Water Craft! *                               

Monday, December 19, 2011

Kids Reindeer T-Shirt Craft

Pix from Factory Direct Craft Blog

I have done kids crafts like this in so many ways for different seasons. They come out so precious and parents and kids go nuts for them! Well, who wouldn't? Practically anything made from kids hand or footprints seem to be a snapshot of their youth. They grow so fast, don't they? So, with much ado, here are the materials you will need.

Materials for Kids Reindeer T-Shirt Craft
  • One plain t-shirt or each child
  • Long clothes line and clothes pins
  • Dark brown acrylic paint fabric medium to mix with the paint
  • Fabric adhesive
  • Newspapers
  • Wiggle eyes
  • One red pompom 
  • Wet towel
  • Paper plates
  • Deep wash bin with small amount of soapy warm water
  • Optional (at least two parent volunteers)
The Set Up: Put up a clothes line in the classroom and keep the clothes pins ready, depending n the number of kids the craft can take up a lot of space! Mix the paint with the fabric medium and pour a small amount on a paper plate. Spread newspapers on a large table and get towels and a wash bin ready. I like to keep the bin and towels under the large table-it makes for an easy clean up!

The Procedure: Have child take off one shoes and sock. They will be using both hands for the project. Help the child dip both hands and a foot in the paint and press it strategically on the t-shirt, then help the child wash up in the bin. Of course, if you have some volunteers, multiple children can be done at one time.
Make it a gift with Artful Adventures Craft Bags
After each shirt is completed hang them on the clothes line. They will need time to dry (24 hours)
After they are dry the children can glue on the wiggle eyes and the pom pom nose. Give it more time to dry on the clothes line. One thing I had done to make the process go faster was have a child hold a blow dryer on the fresh glued pieces (with direct supervision, of course).

Voila! Your finished! You can wrap them in a kid decorated bag or large sheet of paper the kids made. I guarantee it will be a hit!


Saturday, July 23, 2011

Kids Ocean Wave Bottles Craft


There is nothing like taking a bit of the beach home with you. As a California girl, myself I love to bring the ocean and science into the classroom to share with the children.
I used to make wonderful wave bottles for used plastic water bottles, however, times being what they are businesses use much less plastic (great for our environment), but not when it comes to the durability of our kids projects.
The families and I found a great option that the children love; we use these ocean bottles as staple pieces in the classroom, as well gift ideas! Here is a craft I guarantee your preschoolers and families will love!


How to Make Kids Ocean Theme Wave Bottles
More Ocean in a Bottle Ideas!
Cheap clear baby bottles (We go to a local Dollar Store)
Bags of small shells (Any dollar or craft store has these)
Soft clean sand or washed pea gravel (Just enough to settle nicely on the bottom of the bottle)
Small Rubber Sea Creatures (Optional but the kids love them)
Large container of Baby Oil (Optional-give you that wave effect)
Blue Food Color or Bio Color
Silver Glitter (Optional but very pretty)
Masking Tape
Funnel
Water

Procedure: Keep the lids and allow the children scoop in a couple spoonfuls of sand or gravel. Allow children to select 3-5 shells depending to the size and one sea creature to place in the bottle.
Have the children mark a halfway point with the masking tape on their bottle. Let the kids add in their water to the mark and funnel in the baby oil almost to the top. Be sure they are holding it securely so it won’t spill.
Add in one drop of food coloring and a dash of glitter. Now securely tighten the bottle with the bottle plug minus the rubber nipple.

There! Now you're kids have captured the ocean in a pinch!


Thursday, March 31, 2011

Kids Newspaper Sun Hats


Have you ever had those activities where you just simply had to do them every time the season rolls around? Okay, twist my arm, the sun is out and the kids can now make their new paper sun hats!
I can show you a great  modification for the boys that will give it that cool-factor, too!

How to Make Kids Newspaper Sun Hats:
Materials Needed: 
  1. Tons of Newspaper (Have parent start saving)
  2. Masking Tape
  3. Had Picked Flowers (from a nature walk)
  4. Phone Books (Optional is you would like to make the flowers)

The Process:
We do this in a small group activity so have the children standing and gathered around the the child that will go first.
  1. Have all the children drape large opens sheets of newspaper over the child's head. We tell them to be sure we can't see their face or head! The children love this part because they play peek-a-boo, and 'Guess-who' under the newspaper.
  2. I wrap a strip of making take around the child's head two or three times, once we have all smoothed down the newspaper. It is best to start about where the child's eyes are so be sure to hold them close to you during this process. We forewarn them it the tape will sound a bit loud but we are all looking out for them! We even have the group hold the child's hands to steady them because they won't be able to see for a few seconds.
  3. As a group we begin rolling up the loose newspaper up the the masking tape strip while it's still on the child's head. Ah, at last! Now they can see and have a wonderful new sun hat!
  4. Pix from Folding Tree!
  5. Flowers: We use old phone books for the flowers of these hats. This project can go on for quite some time decorating them! We actually have a hat parade for the parents so we don't mind taking our time. If you decide to paint them be sure to allow a few days to completely dry.
  6. Modifications for the Boys: While some boys didn't care for the same look the girls had, they did come up with a clever idea. The Fire Hat! We used the same process but didn't roll the back part of the hat and trimmed it to square it off. Kind of a paper mullet look, but paint it red and you have that cool-factor both boys and girls love.

Monday, March 28, 2011

Kids Phone Book Flower Craft

Photo from Simple Journey

Simple, easy and perfect for Spring! The kids love this craft because there is really no way to mess it up. The more colors and cuts the prettier they become!

How to Make Kids the Kids Newsprint Flower Craft:
  • Bio Color liquid watercolor
  • Newsprint or telephone book pages (this flower was made on newsprint)
  • Metal Brads
  • Hole Punchers
  • Lids (different sizes for children to trace)
  • Pencils
  • Light Colored Construction Paper
  • Glue
  • Glitter (optional)
  • Stamps and Ink Pads (optional)
  • Scissors

The kids love tearing the pages for their flower craft!
Craft Process: Allow kids to freely paint on phone book pages with Liquid Bio Color. After it is dry we have the children trace lids with pencils and begin cutting. We like to do this at a table while socializing and do it for as long at the children are interested. The more cuttings we get the more beautiful the effect. We usually dedicate one day for this project.
After we are finished, we punch holes in the centers of the circle clipping. Depending on how many clipping we have we dedicate on table during option time to hole punch. The children love mastering the hole punchers and are so pleased by their work.
More Water Coloring: We take a light sheet of colored contraction paper and allow the children to paint a beautiful place where they have seen flowers. The children love ink stamping butterflies and insects in the background as well.
The Finished Product: Sure, we take our time with this craft, even having two or three days to enjoy it. For the finale children merely stack the circle clippings from big to small then insert the brad. We attach them to their watercolor painting an add a brush of glue and glitter.
This art has a shabby chic look to it...very pretty!


Tuesday, March 22, 2011

Neat Feet Kids Craft

 We found a great craft idea from  Craft Ideas for Kids that we were able to modify for the classroom! They are great gift ideas for parents just about any time of year!

How to Make Neat Feet For Kids:
Materials Needed
  1. Sensory Tub of Moist Sand
  2. Kids Shoe Boxes
  3. Boxes of Plaster of Paris (follow instruction on the box)
  4. Pen
  5. Towel to dry off those cute little feet!

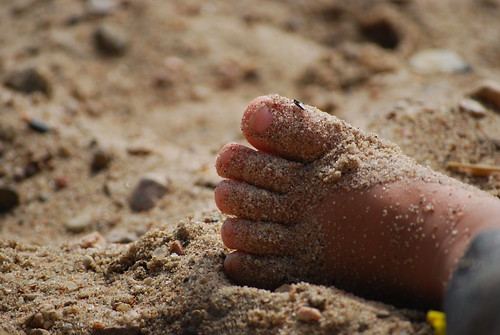
Procedure: Have the children fill their shoe boxes half way with moist sand. We use a marker to show them where to stop. Have the kids take of their shoe and gently press on bare foot into the sand. When an imprint is created follow the instruction on the Plaster of Paris box and pour it in a mold.

Gift Idea: This makes a great gift idea! We glue felt at the bottom of the Neat Feet and turn it into an adorable paper weight!

Wednesday, March 9, 2011

Kids Space Alien Crafts


Space Themes was never one of my strongest areas for teaching young children. The kids I work with are so hands on and well....the stars are not something we can explore with the five senses. We use lots of real images of planets as well as adding a bit of fun and science in the mix.
The whole excitement about space is the mystery of it all.
We gather as many materials as possible and then have tons of fun with space aliens.
Without further ado, this an Honorable Mention Shout out to all the kid crafty aliens out there! If you have any to share as well please do with a back link to the site! Thanks again!

Silly Soap Box Space Aliens by Craft Jr. Good clean fun!

Water Bottle Top Space Creatures! Make them in a snap by: se7ven!


"Sprouts" The Space Alien by Free Kids Crafts! He'll grow on you!

"Space Blob Bob" by Make and Takes. Add some space juice and make him glow!

Monday, March 7, 2011

Kids Crafts from Recycled TP Rolls

 
Who doesn't have tons of TP rolls laying around? I thought I would give an Honorable Mention shout out to some of the best ideas we have found out there for TP roll crafts. They kids will love them, parents will keep them, and you can finally clear out that huge box of them on the shelf!

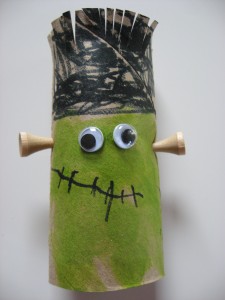
Make a silly monster from recycled TP rolls.

Why wait for Halloween?

There are quite few more craft ideas for tp rolls on here, too! Love it!


Get buggy over this idea at Homeschool Creations

For my "Things That Fly" unit. Thanks Boy, Oh Boy, Oh Boy!

I Can Teach My Child teaches us a thing or two about penguins
For when they're caught being good! Thanks sugardoodle!
Make you favorite characters or family members into finger puppets!
All the buzz-zz-zzzzzz on John Deere Mom

Wednesday, March 2, 2011

Four Leaf Clover Kids Craft


For the Four Leaf Craft be sure to have plenty of green paper or foam on hand. this is one of those projects where they just don't stop at one!
Materials You Will Need:
Sheets of green construction paper or foam
Tape or staplers
Rubber bands
Green sequins of jewels (optional)
White glue of a hot glue gun
Ribbon (optional)
The Process: Instruct the children to create folds in the paper (length-wise)  of foam about five times and start cutting along the folds. This will create long even strips. Allow the children to tape/staple together individual heart shapes from the strips. Once that is done they may adhere the strips by touching all the points of the hearts together in threes or fours. Fasten a rubber band for hanging and add bows for decoration.
We have hot glued a sequin in the center for a special bit of bling!
Extensions: Instead of a rubber band you can add thematic ribbon and by popular 'wee ones' demands I must suggest green glitter (sigh).

I really think I should get stock in this stuff!

Saturday, February 26, 2011

3-D Elmer the Elephant Craft for Kids


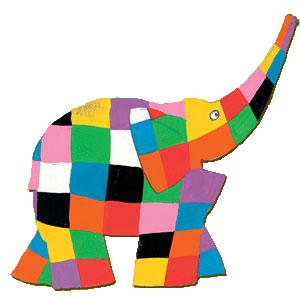
We love Elmer the Elephant. Long after we have read all his stories (multiple times) it is always nice to have some remembrance of him around.
We have found a wonderful adaption of him along with a few friends!
Materials Needed for Elmer the Elephant and Friends
Picture from ctpubblog.com
  • ½ yard patterned fabrics  
  • heavyweight cardboard (Shoebox or Standard cardboard is fine)
  • Fabric scraps for each friend
  • Markers (optional)
  • Paper punch (optional)
  • Yarn (optional)
  • White glue (optional)
Be sure to click on these links for the shaped
 patterns for Elmer
Patterns A
Patterns B
Patterns C

Grrrrr-rrrr!
This is also a great idea when learning about all sorts of animals and dinosaurs.

Although this takes some preparation, little fingers many get tired cutting the cardboard, this project was always a crowd pleaser.

We set aside two days for the project. The first day cutting and gathering all out scrap fabrics and the second day gluing and creating!


Thursday, February 24, 2011

Elmer the Elephant Easy Kids Craft

There is something about Elmer the Elephant all kids seem to relate to and love! I find drawing of Elmer strewn all over the art table after we read this story to the kids. The drawings make a lovely patchwork of their own on the table. Here is a really easy Elmer craft we discovered made from plastic milk the parents we saving for us. They came just in time and the preparation was well worth it!


Material for Elmer the Elephant Easy Kids Craft:
We recomend you do this with the leftovers!
  1. Colored tissue paper the children cut into squares 
  2. Large plastic milk cartons (with a handle) 
  3. White Glue
  4. Water and Small Cups (enough for everyone)
  5. Paint Brushes 
  6. Wiggle Eyes
  7. Scissors
 The Process

Pre-cut the milk carton's, just so, and make 1 part water, 2 parts glue solution in cups for each of the kids. 


They love helping with this!


After the children have cut out all the tissue squares give them the cartons and cups with paintbrushes.


Ta-Da! Here He is!


After the kids begin gently painting the cartons they can apply the tissue paper and gently paint it down with the glue solution. 


Try not to soak Elmer or the tissue will slide off.


The children are guaranteed to be delighted! Be sure to put on his eyes after he is dry!