Showing posts with label Science. Show all posts

Monday, November 19, 2012

Kids Ice Ornaments Craft


Kids Ice Ornament Craft!
 Okay, I have done this is the summer, but winter is another story. Funny how teachers must constantly reinvent tried and true preschool curriculum.
Well, here it is, and for good measure I put a popular link in there that is great for summer from A Sense of Wonder.
Here is how we reinvented summer ice activities to Kids Ice Ornaments for the winter and what our preschoolers are doing with them!

From A Sense of Wonder-Great Idea!
What you'll need to make Kids Ice Ornaments
  1. Balloons
  2. Sink
  3. A Freezer (if it's not snowing outside)
  4. Food Coloring
  5. Glow Sticks (optional, but oh so much fun)

Kids Ice Ornament Process
Kids love filling up the balloons in the sink, but what they love even more is splashing one another! Defiantly recommend direct supervision and assistance with the food coloring.
  1. First have the child put a few drops of food coloring in the empty balloon.
  2. Light a glow stick and place it inside the balloon.
  3. Assist child in filling up balloon at the sink and tying it off.
  4. Make sure there is plenty of room in the freezer and place them inside.

Depending on the size of the balloon, it may take a few hours to an entire day for them to solidify.
When it's time to take them out have the children figure out a way to unwrap their ice ornament.

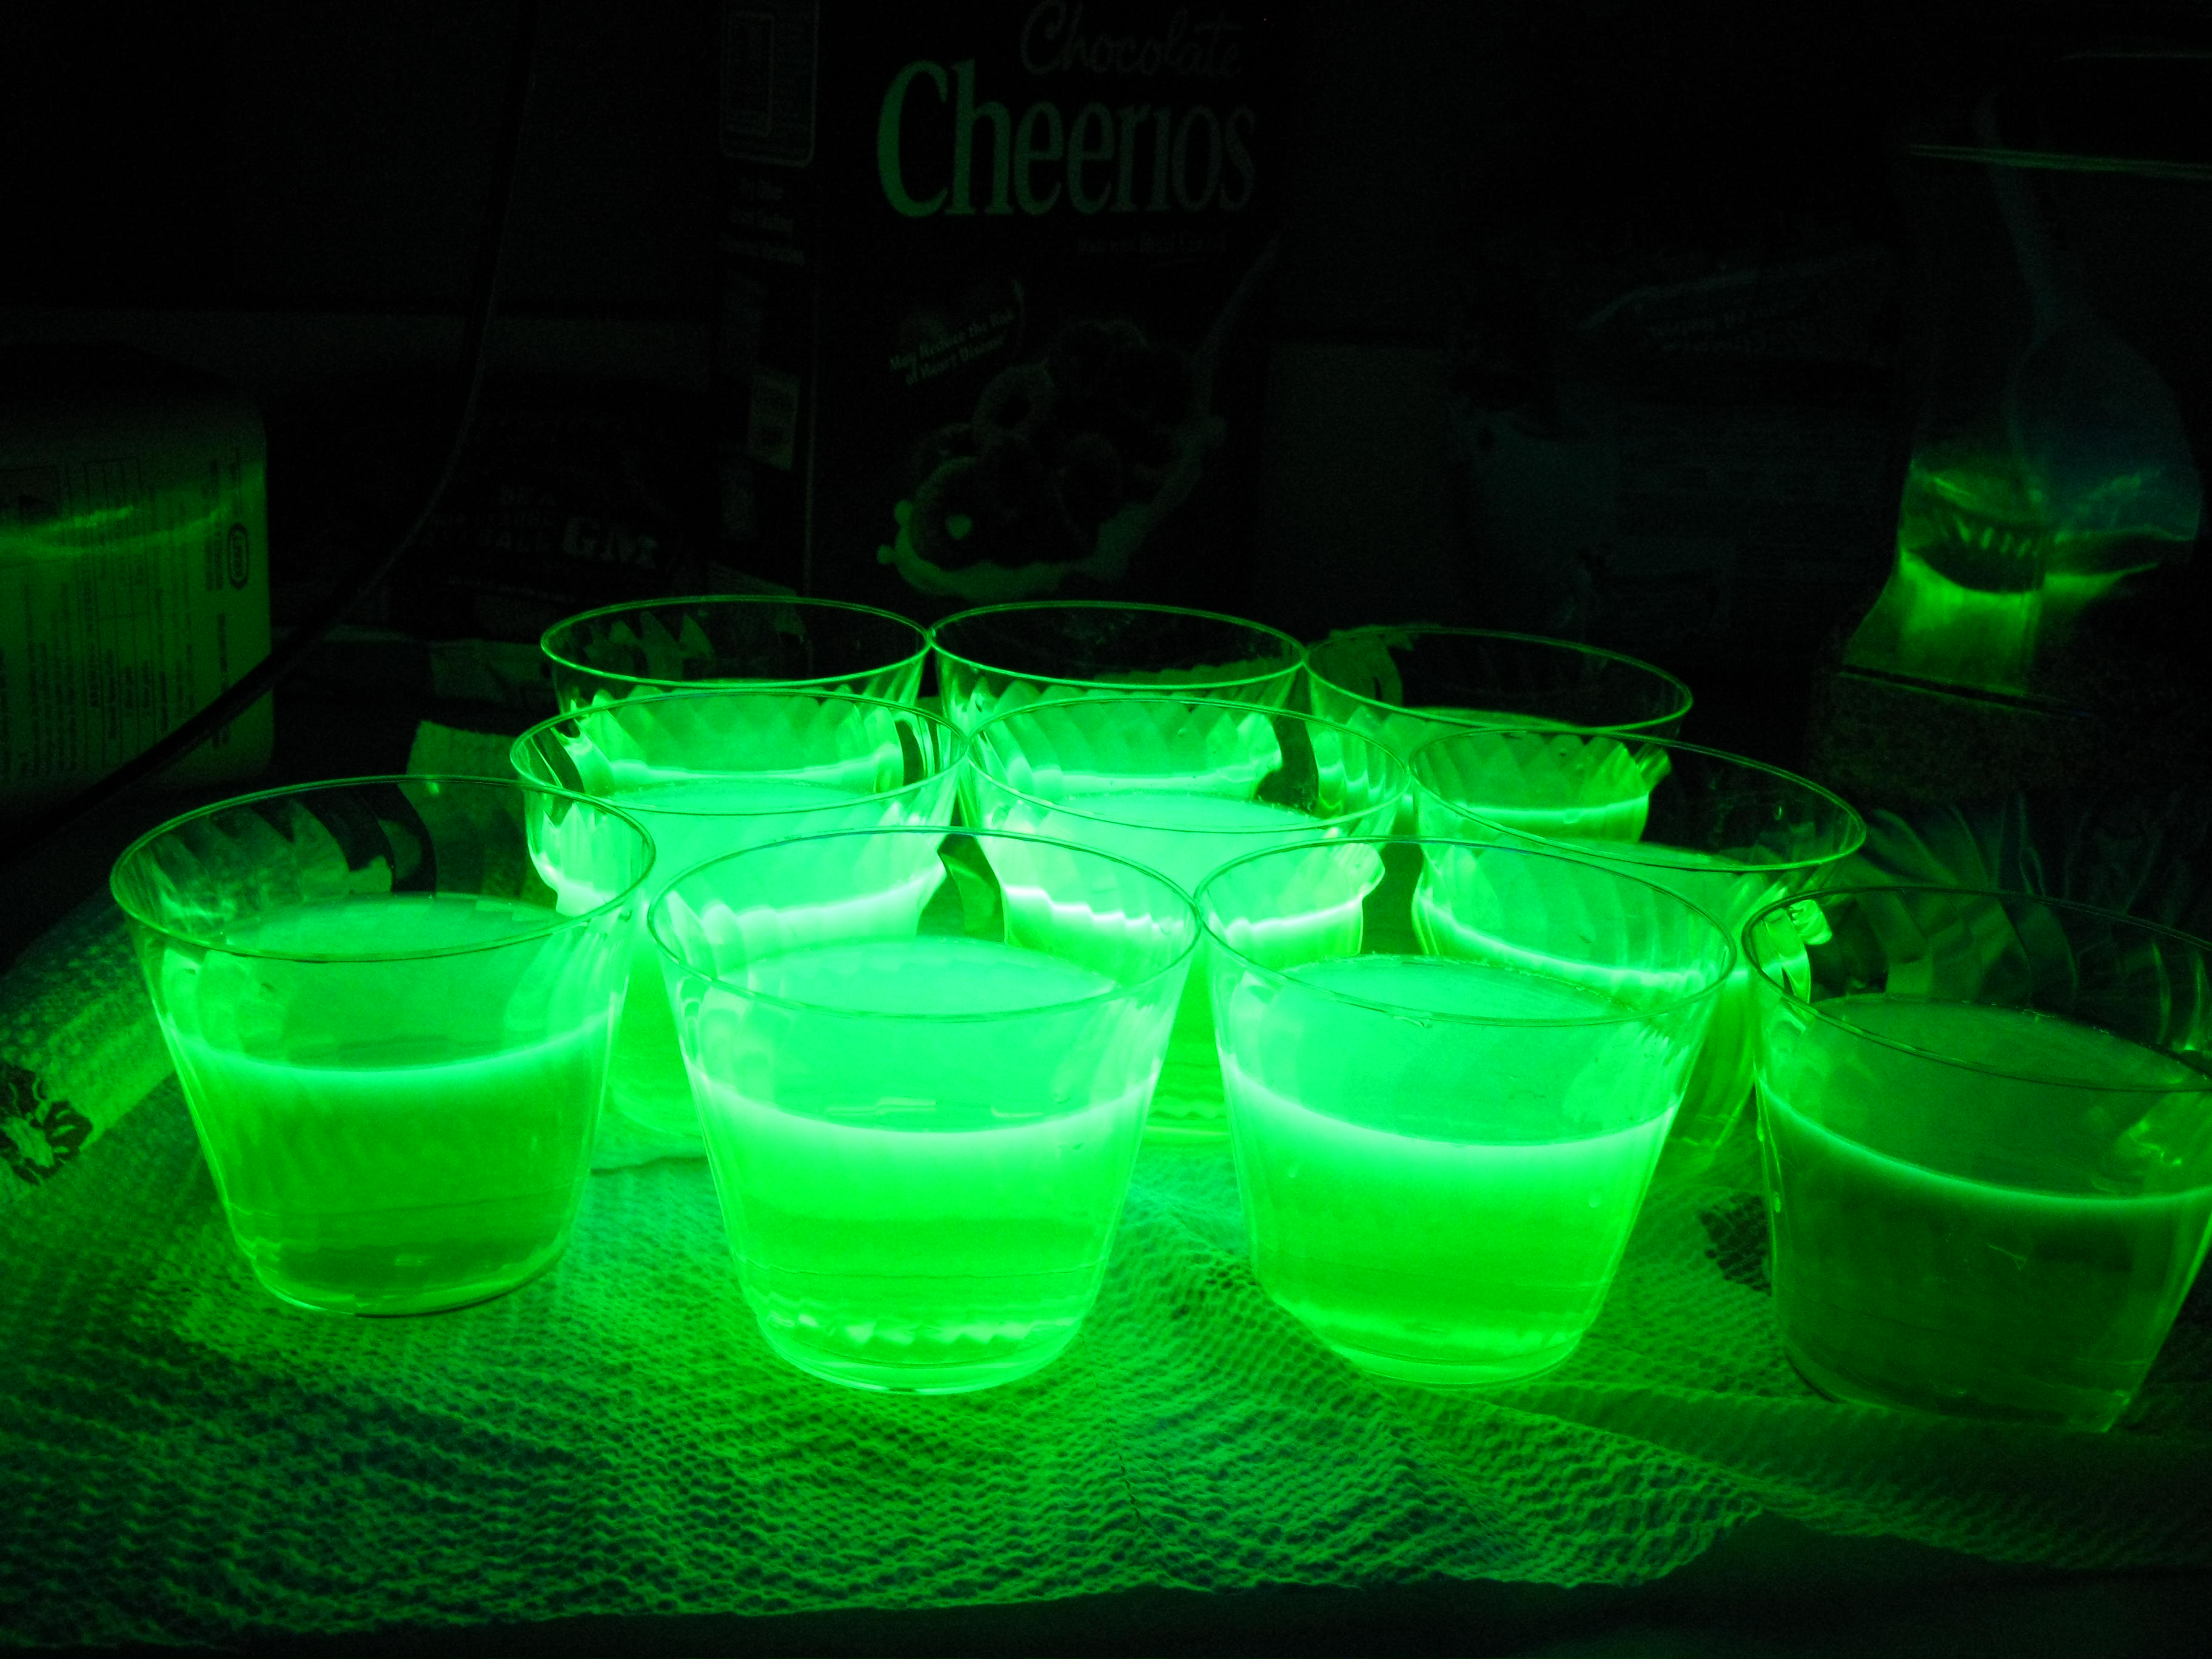
We love to place them in the sensory table lined with aluminum foil and other round objects like unique marbles, and glittery round objects. We turn off the lights and enjoy the soft glow of the glow sticks inside. I love to do this when we study space and planets!

If you can, make more with the children during the coldest weather and arrange to take home and place outside their door!


Tuesday, July 24, 2012

Easie Peasie Homemade Kids Finger Paints


These finger paints are great for a tight classroom budget, but what about a great classroom gift idea for the kids?
Be sure to add at least a tablespoon of dish washing soap to the mixture with the water!
This gift idea is great for:

  • Kids Birthdays
  • End of Summer Gifts
  • Special Holiday Gifts
  • Party Favors 

Saturday, March 31, 2012

Kids Fairy Dust Craft


We highly recommend you make Kids Fairy Dust with the kids, as well as one for yourself. After all, we are all kids at heart, aren't we?

How to make Kids Fairy Dust

Materials Needed:
Glow Sticks (We got ours at Oriental Trading Co. in white for $10.95 for 12. # IN-24/11240 )
Scissors
Iridescent or Diamond Glitter (Found at any craft store)
Baby food jars (enough for each child)
Super Glue

The Process:
  1. Cut a glow stick and shake the contents into a jar. (Teacher only for this part)
  2. Add diamond glitter 
  3. Seal the top ( Super glue) with a lid.
  4. Shake well

Note: The children loved to look at these during rest time as we read the book, Tinkerbell and The Lost Treasure. They turned out simply gorgeous! Thank you to All it Takes is a Can Opener & Crockpot  (2/13/12) post on Facebook for the idea! Ours lasted about 5 hours before it began to fade but it's definitely worth it!

*Looking for more crafts with that magical effect? Check out our Glow Water Craft! *                               

Friday, October 28, 2011

How to Have a Sugar-Free Halloween for Preschool Kids


Screams, howls, and groaning; It’s Halloween, but really it our preschool kids on too much sugar. That eerie feeling in the pit of our stomach is not the excitement but the knowledge that every year we got through the same thing regarding sugar and the kids in the classroom.
It’s time to channel Susan Powter and ‘Stop the Insanity!’ So, is there really such thing as a sugar-free Halloween in our own classroom without the kids knowing? I say there is. We made it so fun and got the parents involved that the kids didn’t notice they weren’t screaming from the sugar rush.
Here are a few things we did to make the Halloween pleasant and fun and practically sugar-free everyone. And it you don’t have tons of volunteers, just make a few modifications.

How We Make a Practically Sugar-Free Halloween for Our Preschool Kids 

Get a fun Halloween Music CD.

Sugar-Free Goodies: Put together small bags of “Yummy Earth” (Sugar Free Candy) Candies in Halloween Goodie Bags (Distribute them after the Party).

The way Halloween haunts me: Kids on sugar!
Apple Float Activity: Fishing for Apples, Float real apples in a large tub of water with mini fishing rods (with magnets on the end). (Stick a paper clip through a golf tee and shove it in an apple, do this a couple times per apple) Float the apples in the water and allow the children to “fish them”. They loved it! Be sure to use small size red apples.

Kids Crazy Glow Water: We make this one ahead of time and turn out the lights on one side of the class room and have it sectioned off a bit with a black sheet and black light. The water is in a larger water table for all the kids to use. We keep this well supervised.

The Slime Pit: We use a cornstarch and water mix to make ooze called the slime pit. We put Halloween trinkets in there like spiders and such and later on add an extension such as food colors to allow the kids to mix colors.

Less Treats More Fun: Much later in the day we have a few Halloween stories and some carrot cake. The kids also vote on some of the same activities we had inside to bring outside (except for the Crazy Glow Water, of course).
By the end of the day we are really worn out.
But at least our eardrums aren’t ringing....

We hope you'll give it a try, we are pretty sure you'll feel brilliant that you did! 

Ha! Out-smarted Halloween this year, baby!

Thursday, July 7, 2011

Sandwich Bag Science for Kids


Keep kids cool in the warm weather with this simple and fun project we like to call, Sandwich Bag Science!
We like to do it in groups of three or four with the kids holding the bags up over their head. On a nice hot day I like to have them 'hypothesize' what they think could possibly happen before, during, and after we finish.
Here is what you'll need for your groups:
  • Sandwich bags (one per group)
  • Rubber bands (for tying bags)
  • Water
  • Sharp pencils (plenty of them)

Thank to Scribbit for the pix and inspiration
Procedure: I tell the children as little as possible about the project. I have them fill the bags with water, tie them with a rubber band and get in groups with plenty of pencils. What I will ask them is what will happen if they poke a pencil through the bag. How many times could they do it, etc. The children often marvel that the bag could be pierced in the first place. I only have one rule during the project. The kids must hold the baggie up over their head as they work.
At the end of the project I will often tell the children to double check and count how many pencils they got into their bags by taking them out of the baggies and doing a re-count. That's usually when the squeals begin!
It gets them every time....
Ah...my favorite part.

Monday, June 13, 2011

How to Make Rainbow Stew With Preschoolers

<><><><>
Celebrate the magic of the rainbow!
Preschoolers are always fascinated with colors and rainbows!
Rainbow Stew is a wonderful activity for any season. It is one of those activities that seem to bring the wonders of magic into the imaginations of preschoolers!
 
Materials You'll Need For Rainbow Stew

  • Measuring cups
  • Large stirring spoon
  • Small spoons (for each child)
  • Cornstarch
  • Sugar
  • Water
  • Large pot or pan
  • 3 mixing  bowls
  • Duct tape
  • Heavy duty plastic baggies (get the gripper zipper kind)
  • Food Coloring: red, yellow, and blue
"This is how we do Rainbow Stew!"

"We love Rainbow Stew!"
  1. Supervise preschoolers mix the corn starch, sugar and water in the pot or pan until thickened
  2. Carefully remove it from the heat and wait for it to cool
  3. Children separate the mixture in three bowls to make different  colors before taking turns to stir or knead
  4. Have children help place each color of the rainbow stew mixture into the Ziploc bags (half way)
  5. Add duct tape for extra security on the baggies 
  6. Have kids squish bags to make the different colors
There are many ways to do Rainbow Stew! What are some of your successful tips and tricks?


Friday, March 18, 2011

Bone-ified Dinosaur Activities for Kids


Preschooler have always had a fascination with bones and fossils. Dinosaurs are a great way to introduce an amazing sense of wonder through the science of it all. How bones are found and collected tell us so much about these great leviathans. With young children, by simply peeking their interest and fascination, you can take your preschool curriculum to new levels of learning. Here are some of the best bone and fossil curriculum we gathered to share with you and your classrooms

Dinosaur Bone Activities Kids Will Love
Milk Bone Dig
Materials needed: Paper bags, Markers, dinosaur stickers (optional), Boxes of Dog Milk Bones (from the dollar store), an outdoor sand box, digging tools and old clean paint brushes (any size)
Procedure: Adults bury milk bones in the sandbox and set out buckets and brushes. Children decorate bags and explain to children how dinosaur bones are found and cleaned by archeologists. Let the children know you will be going on a bone hunt and to walk carefully as they dig. We love to share our stories of our finds after the dig! Bones can be brushed clean and taken home to a very lucky dog!
Dinoaur Tar Pits
Materials Needed: Cornstarch, water, black food coloring or paint, large plastic dinosaurs, sensory tub, smocks
Procedure: Mix cornstarch and water with enough black food coloring for a nice gooey tar effect. Place your "Tar Mixture" in a large sensory tub with the dinosaurs. Dinosaurs will actually "stick" in the tar mixture which gives the kids a really good idea how difficult it could have been to escape.
Clay fossils 
Materials Needed: Modeling clay (you can purchase it in bulk at the art stores) or Air Dry Clay works nicely as well. Small plastic dinosaur skeletons, work trays, smocks, Optional: glue/water solution, paint brush, and with iridescent glitter
Procedure:  Distribute wet clay on tray and have the children make a flat thick slab with their hands. (I give the children time to explore the clay before we actually begin) After the clay is flat the children press the dinosaur skeletons in the clay and we let it dry. It creates wonderful fossil-like impressions what look great brushed with the glitter and glue solution!
Bone Explorers
Materials: Saved bones parents have saved, cleaned and bleached dry-Chicken and beef work really well. Dinosaur skeletons, potting soil, sensory tub, clay work tools and small paint brushes (for sweeping debris from bones), magnifiers, rocks and bits of twigs
Procedure: Arrange bones and dinosaurs hidden in the potting soil in a large sensory tub. Rock and bits of nature really add to the look and feel of and actual archeologists bone dig!
Make a Bone: How about making your own dinosaur bone? Check out The Yellow Fence on blogger!


Tuesday, March 15, 2011

Teaching Young Children About Bugs


"I loved being outside. We'd hold lightning bugs in our fingers and pretend they were diamond rings."
~Loretta Lynn

It's that time of year again. All kinds of bugs and insects are sure to be stuffed in children's pockets and endlessly poked at. I have complied some tips that not only the bugs would appreciate, but the parents as well.

Tips for Teaching Young Children About Bugs
"Okay kids, guess who this is?"
Small Group Learning: I like to gather the children into small groups and help them make a list of all the bugs they can think of on the white board. I'll draw very simple pictures for them as they discuss what insects they have seen and describe what they look like. In order to help children recognize the insects, I collect photographs I have downloaded from the computer.

Tell Bug Stories: Yes, there are wonderful books out there but nothing beats our own stories and experiences when it comes to sharing about bugs. The kids love to hear how I was never afraid of spiders and how one once got stuck in my hair. It also encourages stories from the children so you may want to have a tape recorder or pen and paper handy.

Keeping Learning Simple: we discuss what the bugs do, how they look and perhaps why they are made the way they are. We always go back to relating to ourselves, and why we are made the way we are, too!
"Iron Cross Blister Beetles are mommies, too!"

Creating Bug Compassion: Sounds kind of silly, but it is necessary in studying bugs with young children. Often our prized study subjects will get smashed by will meaning preschoolers thinking they are nasty little intruders. I use friendly bug puppets and have conversations about the similarities between us and nature. Bugs have mommies, daddies, babies. Bug have favorite foods, live in bug houses and make friends....
Sounds pretty simplistic, but it works. I have often heard the children saying, "This bug is somebody's mommy, don't squish her!"

Tuesday, March 8, 2011

Making Kids Crazy Glowing Water


We made crazy glowing water for a science project and decided to take it to a whole new level with the kids! We discovered that making such projects like Flubber, watercolors, Space themes and virtually any activity that involves water can add a glowing effect!

Materials Needed For Kids Crazy Glowing Water:
OOooOOooo! Look what we did!
One black Light
Clear Cups for each child or one large bowl
Highlighter pens
Wrench (Optional)
Water
Sharpie marker

We allow the kids to label their cups with their names. You can have them make the solution in one large bowl or individually in each cup (this requires individual pens for each child). A worthy donation if this works out!
You can break open the pens to expose the filter or simply have the children sit the pens in a small cup of water. This is a more kid friendly approach and it gives them a day to watch the pens transform the water.
The children love turning of the lights and having the black light shine on their creation. H-mmmmmm? Perhaps we are off setting the cost of the highlighters with all the electricity we are saving?

Tips for Teaching Young Children the Skeletal System


I have taught the the names of bones to preschool children and school-ages, alike. 
The songs, diagrams and puzzles are an effective, interactive way to teach children about the bones in the body. Often times the only exposure out children get to bones are during Halloween. 

A good understanding of what bones and the skeletal system really is is by fun learning rather than a creepy, scary one.

We came up with a few various educational resources that can be used to start teaching young children about bones and the skeletal system.

Teaching with a hands on and fun approach can make education and early learning a bit easier for everyone!

Teacher's Link Tips For Teaching Young Children The Skeletal System
  1.  Learn the human body- Skeletal System (Lots of kid friendly language teachers can use)
  2.  Skeleton Floor Puzzle - Large enough for a small group time.
  3.  The Bone Bounce - A Song by Teacher Lucy Jensen
  4.  The Big Story on Bones Website- Tons of resources at your fingertips for answering kids questions. And we know about questions, don't we?
  5.  Skeleton X-rays - For the classroom! (For kids that wanna see!)
  6. Skeletons in the Closet Game- Really fun! It does contain very small parts so it needs adult supervision.
  7.  Them Not So Dry Bones - School House Rock
  8. Labeled Bone Diagrams- a  parent and teacher's cheat sheet

Thursday, October 7, 2010

Halloween Cornstach Ooze For Kids


We love to add a little science lesson while we are having fun! We have always believed that getting kids excited, engaged and utterly curious about any activity makes for the best educational experiences. So what is the best activity? Drum roll, please.
We at Intello Kids believe it's the activity that involves as many of the senses as possible!
Cornstarch Ooze is always a favorite and we tend to die it different colors depending on what we're doing. Green is huge for Halloween fee-lie activities!

How to Make Cornstarch Ooze:
Materials: A large bowl or sensory tub, food coloring, (for a group of 12 or more kids) 5-8 boxes of cornstarch, a warm pitcher water, a towel, lots of newspaper to cover the table
Procedure: Ask the kids to help you mix, pour and knead the cornstarch is the bowl. We like to have the children touch the materials because it will go through a drastic transformation later. Have the children help die the water by adding food coloring and slowly pour it into the cornstarch mixture. Carefully add water until it has a hard consistency yet melts in your hands. If you have added too much water you can add more cornstarch or simply give the mixture time to dry out a bit.
Tips for Success: Have this activity near a water source or tub along with a nice clean towel. Children love rinsing off the ooze as much as digging in it. A towel to dry little hands will save on your paper towel supply.
Hypothesis: The mixture has a low melting point so the heat from our hands melt the mixture much like the sun would an ice cream cone we eat on a hot day. We like to ask the children for their own ideas and write down their own hypothesis.

Mini Bat-o-lanterns Craft


Our preschoolers started bringing these mini pumpkins in the preschool classroom. Pretty soon we had a small avalanche of pumpkins! That's around the time we realized all us teachers really have to get creative with them. Here are just a few creative activities we did. We would love to hear the kinds of things you have done!

In the Block Area: Using them as accessories in building, counting and math games.
In the Dramatic Play Area: We made our own mini pumpkin patch. We used them along with our pretend cooking accessories. A 'Farmers Market' pretend area where children purchased fall fruits and veggies.
Science Area: Cutting them open and inspecting them with magnifying glasses. Cooking and seasoning the seeds (very tasty!). Growing our own pumpkins from a seed.
Art Area: Painting them with everything from water (bringing out the beautiful texture and color) to using tempera paints to give them a 3D surface to paint on. Markers and a damp sponge works great and the kids we practicing drawing faces on them! Then we came up with some Bat-o-lanterns! Here's what we did...

How to Make Mini Bat-o-lanterns:
Materials: A cup of black tempera paint and small paint brush, scissors, black construction paper, white construction paper or wiggle eyes, black marker, hot glue gun, tooth picks
The Process:  Allow children to freely paint their pumpkins with the black tempera paint and allow them to dry (we usually wait 24 hours). The following day the children cut circles in half for the eyes and use a marker to finish them off, and carefully cut out bat wings. For the very young children we have them glue their construction paper clippings on a precut bat wing shape. Sometimes the children get so excited about  practicing their cutting skills we had to get a bit creative! Allow the wings to dry a bit and stick two toothpicks in each pumpkin. Hot glue the wings and eyes on and your bat-o-lanterns are finished! We have seen tape used to hold on the wings but it isn't as sturdy.
Tips: Double up on the tooth picks for added holding strength! We cut off the pointy tips of the toothpick that stick out because the children love to handle them and show them off!

Everyone loves the finished product!

Tuesday, October 5, 2010

Bone-ified Skeleton Craft For Preschoolers


 We love to study bones! What could be more exciting than understanding the bones we have in our own bodies! This craft was actually something I saw the preschoolers doing on their own with Q-Tips. We took the idea and ran with it!

How to Make a Bone-ified Skeleton Craft!
Materials: Picture of the human skeleton (Kids love to learn the names of the bones), black construction paper, white chalk, glue, Q-Tips, a picture of the child's face, scissors (optional)
Procedure: After naming the bones with the children have them construct their own skeletons. Glue on the face and add the Q-Tips for the bones. Kids love to cut the Q-Tips with scissors and love to get very detailed! Be sure to have them write their name with the chalk.
Extensions: If you have any holiday stickers it really adds a finished look to their work!

Find out more Bone-ifed tips for teaching Kids about the Skeletal System

Friday, September 24, 2010

Ice Excavation with Preschoolers


We have our preschoolers work on problem solving techniques, cause and effect, cooperation skills all in one activity! We have ice excavations at our sensory table and it is always a fun engaging activity that really gets our preschoolers thinking and working together!
Here is what you need for your ice excavation!

Materials Needed:
  • Large and various sized bowls to freeze water in
  • Small materials such as buttons, Lego's or plastic animals. This activity fits well with any theme because you can have excavation items coincide with your preschool curriculum
  • Rock Salt: although it's not necessary it is great to help melt the ice. Supervision is required if you decide to let the children manage the salt because it is a toxic substance.
  • Brain storm with the children what materials you should use to get the items out of the ice. Spoons, brushes, small hammers, fly swatters, etc. We have the children report to us what is working best! 
  • A Sensory Table or tubs
  • Keep some cups of hot water handy 
The Prep Work:
Gather you materials you wish to freeze in ice and fill your containers some half full. Freeze them with no items inside. After a the ice is frozen, place materials in top of the ice and cover them over with water and freeze them again. Ice excavation deep in the ice will really cause kids to work for the materials that are frozen at different levels.
Ice Excavation Presentation:
Put your various frozen ice blocks the sensory table or tubs along with all the materials you and the children have chosen to excavate them with. Pour hot water over the ice to create nice smooth grooves to work with. Ask the children to work together to get the ice out and brainstorm together what is working and what isn't!

How do yo like to have children problem solve?

Monday, September 13, 2010

How Do I Keep Preschoolers Occupied on a Rainy Day?


 There are lots of great places for kids to escape the rain in San Francisco, too!

Rain, rain go away come again some other day! You and your preschoolers don't have to be miserable on rainy days. Use the time you have together to get creative, problem solve and use your imaginations!


  • Make a home made fort! Use cushions, sheets, chairs and whatever else you can think of to make a comfy fort to play in. Kids love small spaces and love figuring out how to add to them. Deciding what it will be, how you will use it, or how to make it bigger challenges kids to not only use their imagination, but problem solve as well.
  • Go Carpet Ice Skating! Move the furniture out of the way and create a space on the carpet. Apply layers of wax paper over kids feet (socks only) and secure it with a rubber band. Play some jazzy kids background  music and let them skate to their hearts delight!  It’s a sure fire way to get those preschool wiggles out.
  • How about a providing a soothing art activity? Have your preschoolers make their own watercolors by adding a few drops of food coloring from the kitchen or by dying the water by tearing colored tissue paper in cups of water. You and your children are now blending together your own custom colors! Playing some nice classical music in the background really sets a relaxing mood.
  • Get their learning on with fun math activities! Set out small plastic bowls together and gather groups small objects such a pennies, paper clips, marbles, raw beans, etc. Challenge your children to sort, count, add and subtract in the bowls!
  • Have a flashlight scavenger hunt! Make a nice long list of hidden things for the kids to look for. Now hide specific objects in the room and dim the lights. Let your preschoolers look for the objects by spying them out with a flashlight!
  • Make a simple model sail boat out of a nutshell, Styrofoam or wood. Your preschoolers would love to sail them in all those wonderful puddles!
  • A have a puppet show! Use puppets you already have on hand or color your characters on paper bags a set your stage behind a small overturned table or two chairs draped with a blanket.
  • Do some Rain Art. The rain can make it’s own watery art as well! Have your children freely color a white piece of paper with markers (coloring most of the paper). Now place the art on the underside of a cookie sheet and set it out in the rain. Depending on how long you leave the art outside will determine what it looks like. When you bring it inside be sure to let it dry thoroughly before picking it up. The rain allows for those beautiful colors to all run together creating your  Rain Art Master Piece!
  • Make Hot Chocolate. It’s great to warm chilly little fingers and toes! Get creative and have them add some special ingredients like marshmallows or cinnamon.
  • Do you have a large group of children to entertain? How about a game of Bouncing Balloon Volley Ball? Clear a space and divide the room with a length of colorful yarn between two stable chairs. Have kids keep their hands on the ground and move about only using their socked feet to kick the balloon! It’s guaranteed to bring giggles and loads of fun!
Pix from The Natural Learning Community
  • How about a nice walk in the rain? Grab your boots and umbrella and enjoy the fresh air and see what you can explore together outside.
  • We create a separate schedule aside from our normal one specifically for rainy days. We use it for days where we may be thrown off schedule because of a field trip, classroom visitors, or coming back from long holidays. We allow for as much structured outside time as possible as well as dividing the children into separate groups for outside time. A small group taking turns to go sloshing in a light rain for 15 minutes is easier than a whole group chomping at the bit for missed outside time.
    What types of activities do you like to do on rainy days?

      Wednesday, August 4, 2010

      Ice and Preschool Curriculum


      I love using ice with kids! Kids naturally gravitate toward water play so why not introduce some of its other forms! Here are some different areas of the curriculum we have used ice!

      Ice and Preschool Curriculum:
      Animal Habitats: What animals live in cold climates? Filling large bins or a table with ice and providing small plastic animals that live in these icy climates will immediately engage preschoolers. Why do animals look the way they do? How do these animals keep warm? Kids can get really creative with answers! We also like to provide real pictures of the polar animals nearby as well a great books they tell kids the real story!
      Science Experiments: Did you know simple experiments with salt and ice get kids thinking? Not always understanding exactly how and why through experimentation we motivate out kids by creating a sense of wonder!
      Materials: Ice cube, paper plate, table salt, a small length of string
      Procedure: Set ice cube on the plate and pour table salt on top. Now lay a string across the ice and wait. Gently lift off the string with both hands and you will be lifting the ice cube as well! What kind of questions would you ask to get kids thinking?
      What Can Water Do?: Fill two latex gloves, one with ice cubes and another with water. Ask the kids to feel them. How does each one look? Why does it look that way? Which one is water? Allow the ice to melt on the glove during the day and see what happens.
      Making ice pops with kids really helps them to to use all their senses and how the properties of water change.
      Art Activity: Color water with different shades of food coloring or Bio Color. Then freeze them in trays. After they are frozen let the kids slide them around on paper to make gorgeous watery art!

      What activities do you like with ice?

      Tuesday, July 20, 2010

      Great Quiet Activities for Kids


       "There are some things you learn best in calm, and some in storm."
      ~Willa Cather

      Kids are so full of energy and laughter. I grew up with two other sisters and I remember how I used to scream when something was funny. Unfortunately the rest of my family didn't find it so funny when the sound traveled up their spinal columns. The fun would quickly end after that. I suppose that is around the time my mom started figuring out quiet activities for us kids to do. Most activities us teachers do with kids to keep them engaged tend to be exciting.....okay, so now that they are all excited how do we get them to wind down? It's always good to have a bag of tricks you will need to get kids calm and quiet for the next activity. Here are some quiet-quick-tricks we use that are especially helpful.

      Quiet Activities for Kids That Really Work:
      Read a Story: Okay, this can be a bit tricky depending on the story, but classics like, Good Night Moon and The Napping House really appeal to kids.
      Finger puppets: Yes, finger puppets! The small individual ones that fit on one finger. Believe it or not simply passing them out on a table with small books to read really helps kids focus and wind down.
      Cards: We all have stacks of cards somewhere. Kids can make card houses or play simple matching games.
      Marbles: Kids love marbles! A simple game of marbles is quite easy to teach while gently bouncing them off of wood blocks makes a pleasant sound.
      Lotion: I have been known to have kids stop after washing up from outside play to apply lotion to their own hands, face or legs. Lotion tends to immediately have a calming effect and has a lovely scent.
      Socks: Okay, it doesn't have to be a sock, per say, but here at school we always have stray clean socks around. The guessing game, "What's in the Sock?" means simply putting a few small items inside and gather a group. We give clues to the kids as to what may be inside.
      Small pom poms: We have a bunch of these for crafts but a quick quiet activity could mean giving them to the kids as a sorting, or math activity.
      Guess the Drawing: If you are fairly good at drawing gather a group and slowly begin to draw on a large chalk or dry erase board. The slower you go the more time they have to think. Keeping it simple like only drawing items withing the learning environment really gets them thinking. We always give clues!
      Water Play: Get a few small plastic bins and fill them with a few inches of warm water. Place a few very small cups, droppers and toys inside. Small plastic animals are a hit, too. One or two children per bin works best.

      Saturday, July 10, 2010

      Print, Stamp and Stencil with Kids


      "Painting is just another way of keeping a diary."
      ~Pablo Picasso

      Tired of the same old printing activities? Before you draw a chalk outline around you art curriculum and call it kaput keep in mind that there are always fresh ideas live on the blogosphere! As a young child I had always figure when it came to art, "where there's a will there's a way!" Us kids used whatever was available!
      We would love to hear your ideas as well!

      TP rolls
      Fruit or vegetables
      Toilet plungers
      Corks
      Bubble wrap
      Cookie cutters
      Cardboard
      Play dough Toys
      Wood blocks
      Leaves
      Balloons
      Corn Cobs
      Combs
      Textured Fabric
      Toy cars
      Lace
      Hands and Feet
      Doilies
      Styrofoam Shapes
      Body Puff
      Lip Stick
      Loofah
      Mini muffin tins
      Pie tins
      Sponges
      Stamps
      Fly swatters
      Plastic forks
      Stencils
      Plastic lids from containers (to make circles)
      Lego's
      Bingo ink blotters
      Strawberry Baskets

      Friday, July 9, 2010

      Super Easy Homemade Finger Paints


      Finger paints disappear so fast! I had to find and easy-piesy-lemon-squeezy way of having them and not blowing my budget. Homemade really is the go! We have a great recipe that can be put together in a snap with household products we already have!

      How To Make Super Easy Finger Paints for Kids:
      Materials Needed: 2 cups white flour, 2 cups cold water, food coloring or Bio Color
      The Process: Put water into a large bowl. Slowly add the flour, while the children are stirring. Once it's all mixed together, divide into smaller bowls and add food coloring or Bio Color. Kids just love to be a part of making and creating new things. Art and creativity, science and measuring; we can never underestimate what kids are actually learning with well planned activities!

      We aren't afraid of kids getting a bit messy. How about you?

      Saturday, July 3, 2010

      25 Things to Do With Kids This Summer!


       Nothing to do this summer? Don't let it happen to you....use your summer wisely with 25 tips to kick off your creative thinking! Let's see where it takes you!

      25 Things to Do With Kids to Kick Start the Summer:
      1. Catch fireflies or bugs in a jar, study them and then let them go.
      2. Take pictures of the kids having fun and make a scrapbook!
      3. Eat watermelon outside, and let the juice run all over the place!
      4. Walk in the grass barefoot with the kids.
      5. Use lotion, soap, or shampoo that smells like coconuts.
      6. Make homemade popsicles in paper cups and eat them on a hot day.
      7. Get out the kids' watercolor paints and paint a picture of summer means to you.
      8. Collect seashells and save them with some sand in a decorative bowl.
      9. Make strawberry shortcake.
      10. Make thank you cards for everyone who has helped you out.
      11. Eat your favorite summer fruits and berries.
      12. Go swimming as a family.
      13. Have a water balloon fight.
      15. Go for a nature walk along the beach or a wooded path.
      16. See the sunrise.
      17. Have a picnic.
      18. Watch the sunset.
      19. Make playdoh.
      20. Read a chapter book aloud to your kids.
      21. Make homemade ice cream in a Ziploc bag.
      22. Sit outside and sip iced tea.
      23. Make fresh lemonade.
      24 Camp out in a tent in the yard.
      25.Make a commitment to learn something new!